

How To Install Attic Decking
This section provides a guide on "how to install insulation." It covers specific information on installation details for attics and ceilings that will assist with proper installation to meet RESNET Grade one criteria for fiberglass and mineral wool batt insulation. Covers topics from hatches to ventilation baffles, and provides links to publications and videos for more information.
Click Here to download a PDF of these instructions in English
Click Here to download a PDF of these instructions in Spanish
Critical Details for Ceiling and Attic Batt Insulation Installation
Cranium Access Hatches – Seal and Insulate for All-time Installation Results
– +
Insulation Options
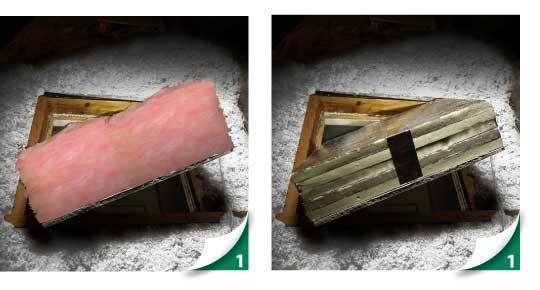
Selection 1A: Permanently attach batt insulation to the attic admission. Ensure that R-value meets or exceeds surrounding insulation levels.
Selection 1B: Permanently attach rigid insulation to the attic access. Ensure that R-value meets or exceeds surrounding insulation levels.
Critical Details
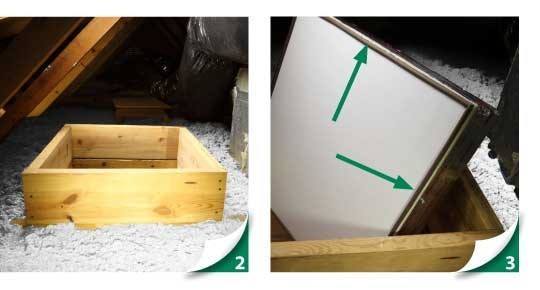
- Install dams around access holes to protect the surrounding insulation.
- Install weather-stripping on access trim. Verify seal.
Notes:
When insulating pull-downwardly stairs, pre-fab or site-built, insulated and conditions-stripped covers are recommended.
There are multiple options for attaching insulation to the access hatch. The intent is for the insulation to remain fastened after repeated homeowner use and that the insulation has an equivalent R-value of the surrounding attic insulation.
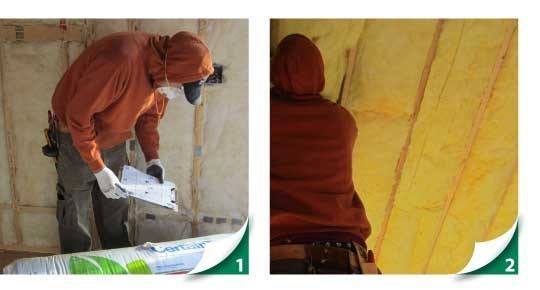
How to Install Batt Insulation in Ceilings with Attics
– +
Disquisitional Details
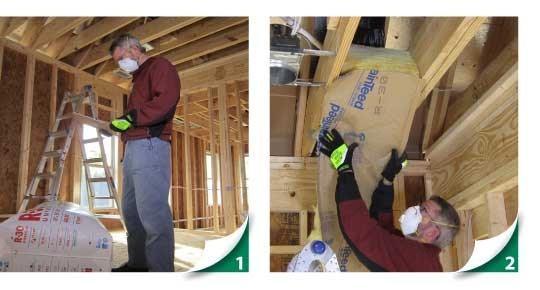
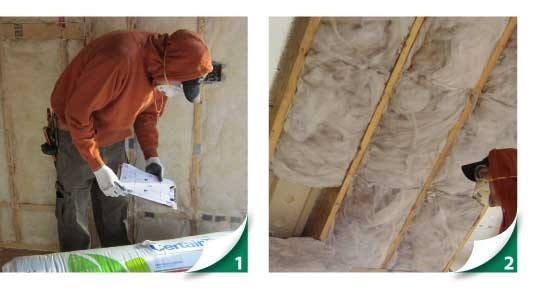
- Verify insulation material is the correct width and R-value for the location.
- Friction fit insulation snugly between and parallel to all standard and narrow attic framing members.
- Ensure insulation extends to the outside border of the outside top plates and is flush against whatsoever ventilation dams/baffles.
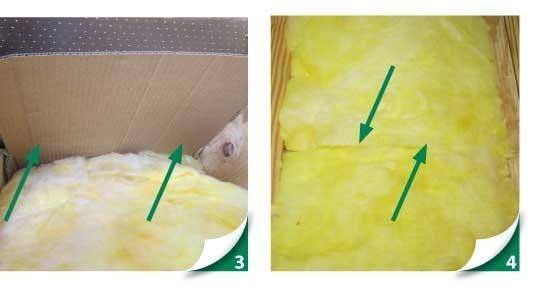
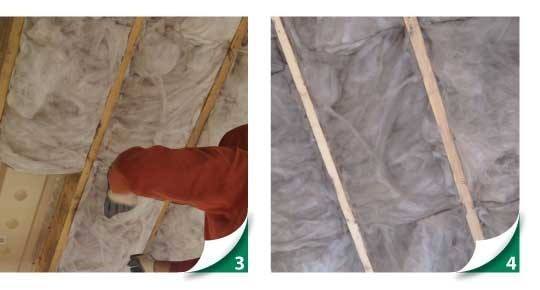
- Ensure ends of insulation are butted together and flush to underside of framing.

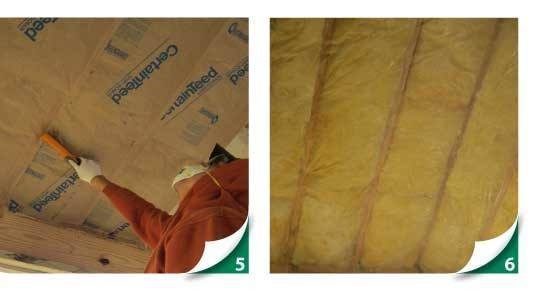
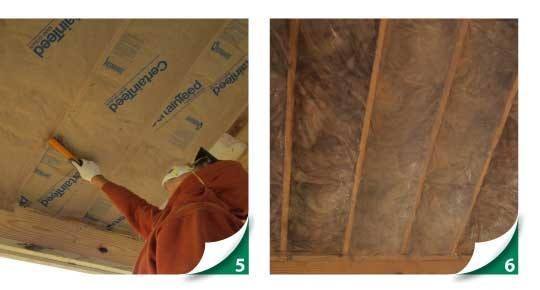
- When using kraft-faced batts: Fasten kraft face tabs of insulation to the underside of framing members. Annotation: No kraft newspaper overlapping required.
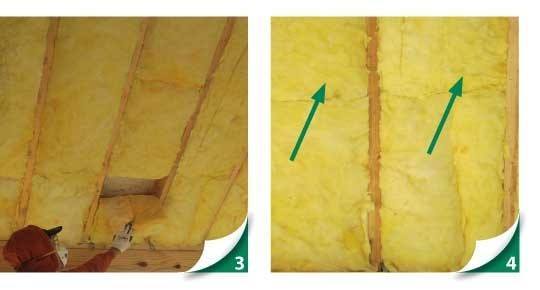
- When using vapor retarder and unfaced batts: Fasten vapor retarder to underside of framing once batts are installed. Overlap seams at to the lowest degree 2 inches.
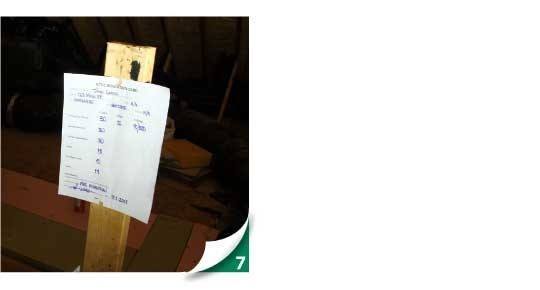
- In the attic, install a menu that indicates attic insulation levels in the house to meet code requirements.
Options
- Choice: When installing multiple layers of insulation for optimal thermal functioning, install the first layer (bottom layer) parallel to attic framing members and flush with both bottom and top. Install the second layer (top layer) perpendicular to attic framing members. Both layers combined must equal at least the required R-value.
Batt Insulation Installation Techniques – Ceilings without Attics (Unvented)
– +
Disquisitional Details
- Verify insulation material is the correct width and R-value for the location.
- Friction fit insulation betwixt and parallel to the cranium framing members.
- Ensure insulation extends to the outside edge of the outside superlative plates and to the pinnacle of the cathedral ceiling.
- Ensure ends of insulation are butted together and flush to underside of framing.
- When using kraft-faced batts: Fasten kraft confront tabs of insulation to the underside of framing members. Annotation: no kraft paper overlapping required.
- When using vapor retarder with unfaced batts: Fasten vapor retarder to underside of framing members once batts are installed.
Batt Insulation Installation – Ceilings without Attics (Vented)
– +
Disquisitional Details
- Verify attic insulation cloth is the correct width and R-value, and ventilation chutes and baffles have been installed per manufacturers' specs.
- Friction fit insulation between and parallel to the attic framing members.
- Ensure insulation extends to the outside border of the exterior top plates and is affluent against all ventilation dams and bamboozle boards.
- Ensure ends of insulation are butted together and flush to underside of framing.
- When using kraft-faced batts: Fasten kraft face up tabs of insulation to the underside of framing members. Note: No kraft paper overlapping required.
- When using vapor retarder with unfaced batts: Fasten vapor retarder to underside of framing members once batts are installed.
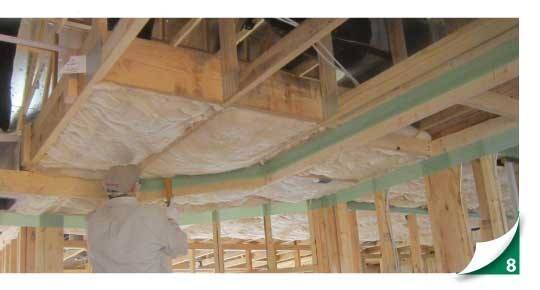
Batt Insulation Installation to Roof Deck – Conditioned Attics
– +
Critical Details

- Verify insulation material is the correct width and R-value for location. Besides, verify the depth of roof rafters is at to the lowest degree the depth of the required R-value.
- Friction fit insulation betwixt and parallel to the attic framing members.
- Ensure cranium insulation extends to the outside edge of the exterior top plates and to the peak of the cathedral ceiling.
- Ensure ends of attic insulation are butted together and flush to underside of framing.
Note: Ensure conditioned cranium insulation strategy is compliant with local burn codes.
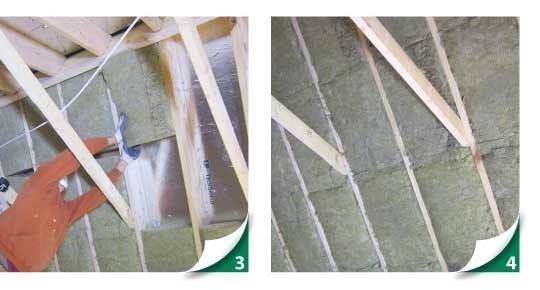
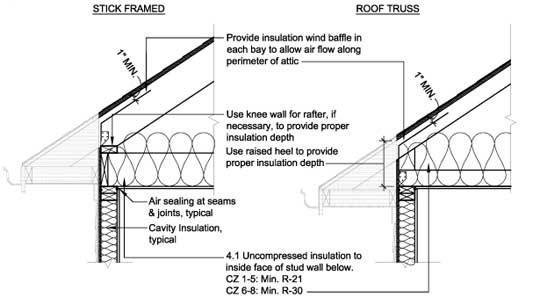
Ventilation Baffles for Insulation Installation – Ceilings with Attics
– +
Disquisitional Details
- Verify that infinite between roof deck and elevation plate will accommodate the advisable insulation and a minimum i-inch of required air infinite.
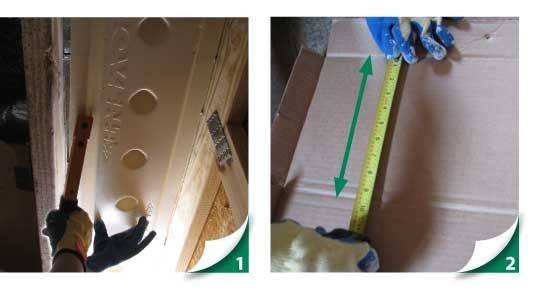
- Measure and mark the tiptop on the baffle. Verify the height allows for 1-inch of required air infinite.
- Cut side fin and fold bamboozle at the measured mark to allow for correct insulation height.
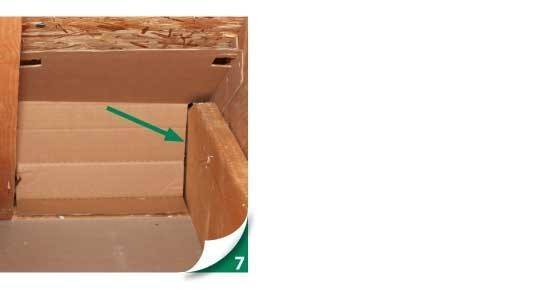
- For all eaves with vents, fasten bottom of baffle in place to allow attic insulation to completely cover the acme plate.
- Spike superlative portion of baffle in place to allow for a minimum 1-inch space between baffle and roof deck.
- Note: If cathedral ceiling, spike baffle boards to provide continuous unblocked airflow from soffit vent to ridge vent.
- Note: Advisedly cutting bamboozle around any framing obstructions to forbid air movement through insulation.
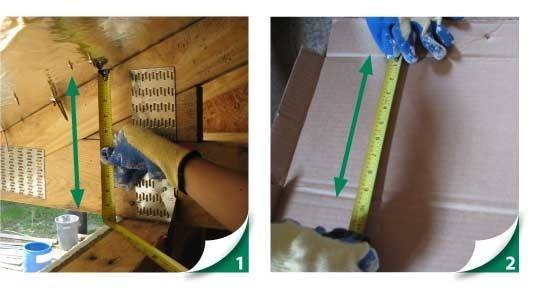
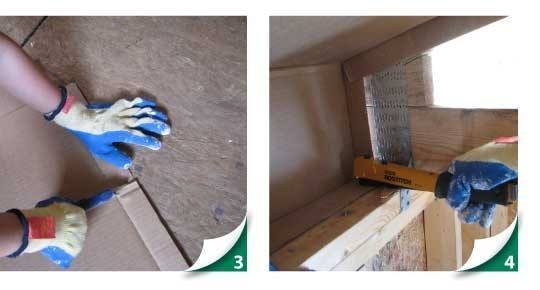
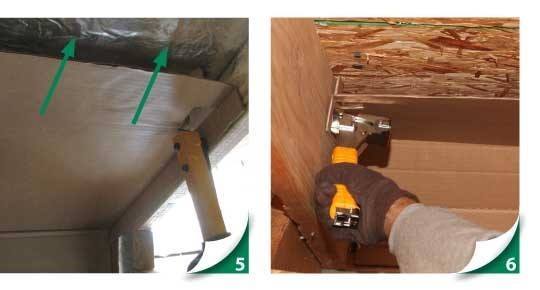
Ventilations Chutes for Batt Insulation – Ceilings without Attics (Vented)
– +
Disquisitional Details
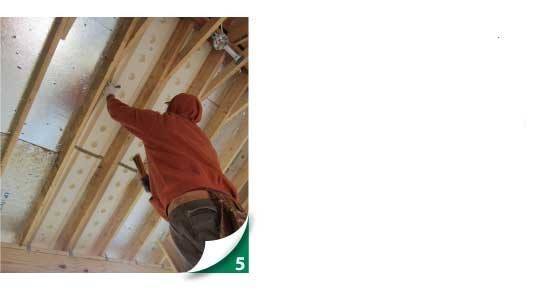
- Spike baffle lath to underside of roof deck extending past the outside edge of the top plate and across the height of the insulation.
- Measure and marking the height on the bamboozle. Verify the height allows for 1-inch of required air space.
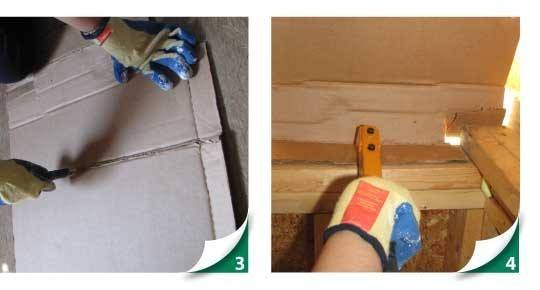
- Cutting soffit dam material to allow for correct insulation superlative and whatsoever obstructions.
- For all eaves with vents, fasten soffit dam textile to the attic framing or permanent blocking so that insulation will completely embrace the top plate.
- Note: If cathedral ceiling, spike baffle boards to provide continuous unblocked airflow from soffit vent to ridge vent.
Notes:
- For ceilings with attics, it is only necessary to install ventilation baffles. For ceilings without attics (vented), install both ventilation baffles and chutes.
- Ventilation chutes should exist installed with a 2" gap between the ends. Reduce gap to ½ " when using blown-in insulation.
Options

Technical Tips for Ceiling and Attic Batt Insulation Installation
Obstructions/ Obstacles
– +
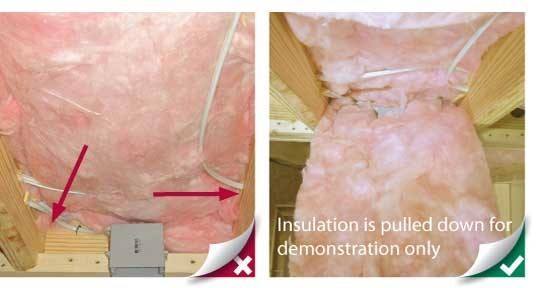
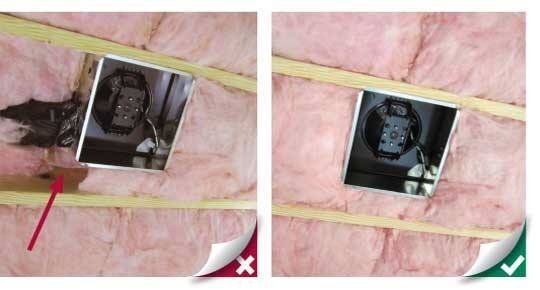
Boxes (electrical, smoke, CO, etc.)
Do: Cut and/or split insulation around wiring and boxes.
Ceiling Fan Boxes

Do: Cut and/or split insulation around wiring and boxes.
Recessed Lights (IC and ICAT rated only)
Do: Cut and/or divide insulation around wiring and recessed lights and fit snugly to boxes. Notice: Recommend using ICAT rated.
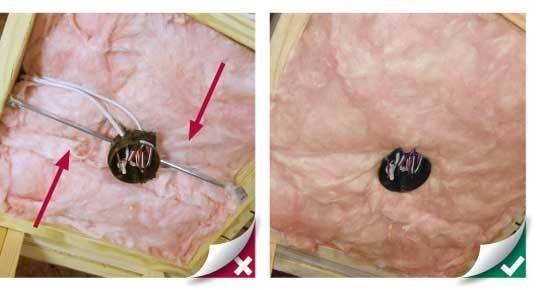
Wires (electrical, cable, security, low voltage, etc.)
Do: Cut and/or split insulation around wiring and fit snugly to boxes and other obstructions.
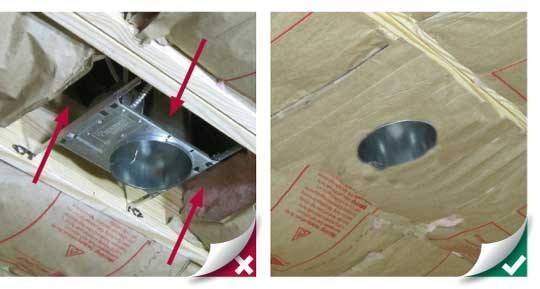
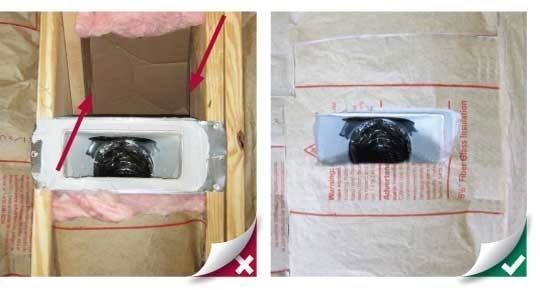
Exhaust/Ventilation Fans
Do: Cut and/or split insulation around exhaust fan boxes, ductwork, wiring and any support bracing and fit snugly to boxes.
Ducts/Connectors
Do: Cut and/or split insulation around HVAC Boots and insulated ductwork and whatsoever back up bracing.
Pipes (Water Supply, Plumbing Vents, etc.)
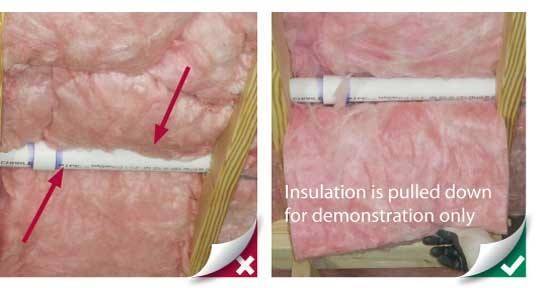
Do: Cutting and/or split insulation effectually pipes
Notes:
The clearance between insulation and fossil-fuel appliances, chimneys, recessed lights and other hot surfaces must run across the requirements of the National Burn Protection Association (NFPA) and International Code Council (ICC) edifice codes, and the apparatus manufacturers' recommendations – whichever is about restrictive.
In general, when installing insulation in contact with or near hot surfaces:
- Check the manufacturer's instructions for equipment and appliances to determine any insulation requirements or restrictions.
- Check the applicable building code for insulation clearance requirements. These are typically contained in the fire, building and mechanical codes. If in that location are whatever questions – consult your local edifice section for the applicative requirements.
- Mineral cobweb insulation (fiberglass, stone and slag wool) are noncombustible but may have combustible facings which cannot exist used in hot applications. These insulations are too bachelor with noncombustible facings and facings which have flame spread and smoke developed indices appropriate for about code requirements.
- When it is permissible to insulate in hot applications, note that almost fiberglass products used in building insulation melt at approximately 800 degrees F and rock wool products used to insulate buildings melt at approximately 1200 degrees F. Both fiberglass and rock wool materials are available which have higher melting temperatures.

Source: https://insulationinstitute.org/im-a-building-or-facility-professional/residential/installation-guidance-2/attics-and-ceilings-2/
Posted by: phelpsafterew.blogspot.com
0 Response to "How To Install Attic Decking"
Post a Comment